Extending ALICA
This page describes how you can develop your own ALICA Analyzer or Controller to suit your needs.
This page will guide you through the process of creating your own Analyzer, but applies as well to creating a Controller.
General knowledge of Java programming is assumed and recommended.
Required JDK version: 1.6.0_31 (Same as MicroManager’s)
Implementing a custom Analyzer
Step 1: Importing the Analyzer interface
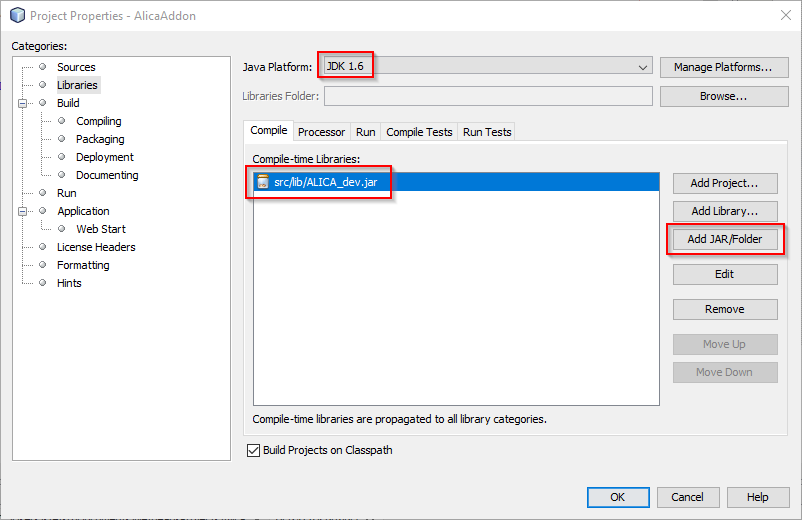
First, download the ALICA_dev.jar file from the relevant
release,
and include it as a resource of your project (in NetBeans,
add it to Project Properties -> Libraries -> Compile-time Libraries
using the Add JAR/Folder button). This jar file contains all ALICA libraries,
as well as necessary MicroManager and ImageJ libraries.
In the same pane, you have to ensure that your JDK version is 1.6 (same as MicroManager’s).
Step 2: Implementing the Analyzer and its Setup/Status panels
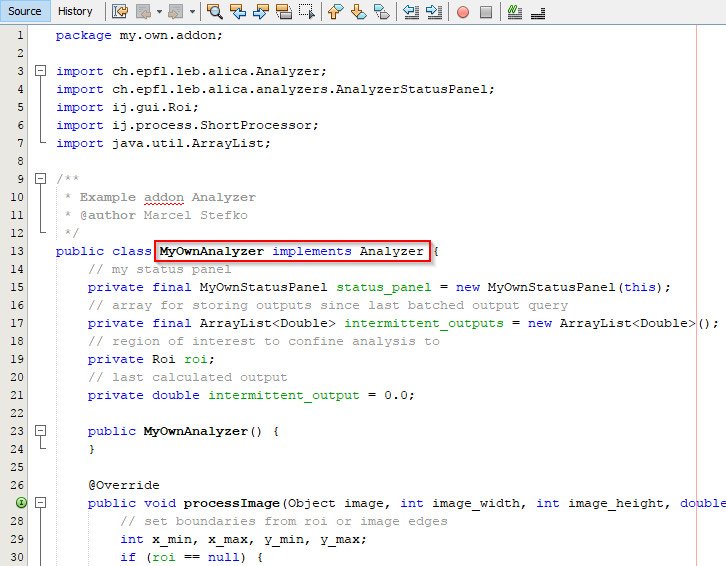
Implement the Analyzer interface from package ch.epfl.leb.alica, and
extend the AnalyzerSetupPanel and (optionally) AnalyzerStatusPanel
abstract classes from package ch.epfl.leb.alica.analyzers. Check the
API documentation for details. You can
also consult the source code for already implemented Analyzers
on GitHub.
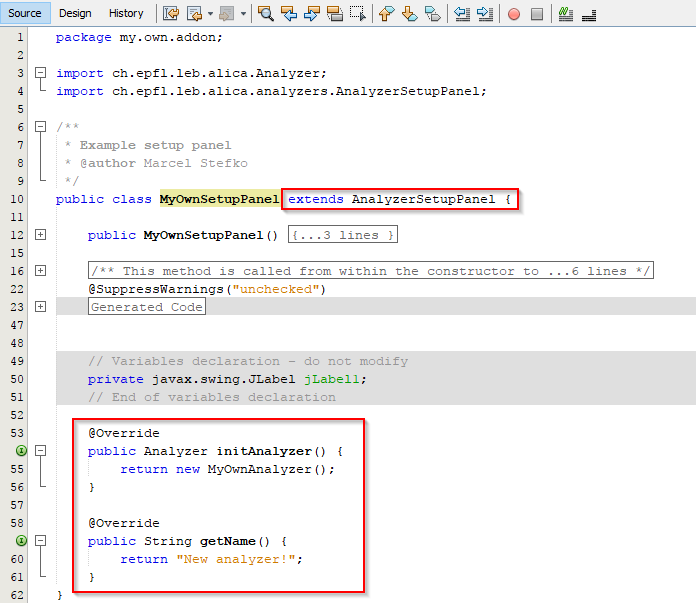
To give a little bit of intuition, the AnalyzerSetupPanel
serves as a Builder for Analyzers. In the Panel, the user can modify
initial settings of the Analyzer. When ALICA Start button is clicked,
the initAnalyzer() method is triggered, which builds the Analyzer. This
Analyzer can provide a AnalyzerStatusPanel, which (if provided) is embedded
in the ALICA monitor GUI, and allows further interaction with the Analyzer.
In NetBeans, it is easier to first create a Swing JPanel form,
implement user input fields, and then finally change the
implements javax.swing.JPanel declaration to
extends ch.epfl.leb.alica.analyzers.AnalyzerSetupPanel,
and implement the required methods (similarly for StatusPanel).
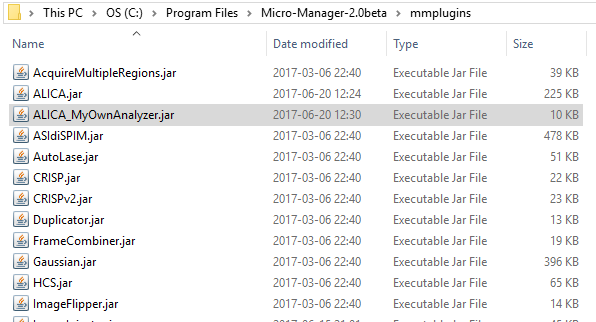
Step 3: Compiling the created Analyzer
Once all required functionality is implemented, compile the project into a
.jar file. Remember, that the jar filename must start with ALICA_,
e.g. ALICA_MyOwnAnalyzer.jar. Place this jar file into the mmplugins/
folder of MicroManager.
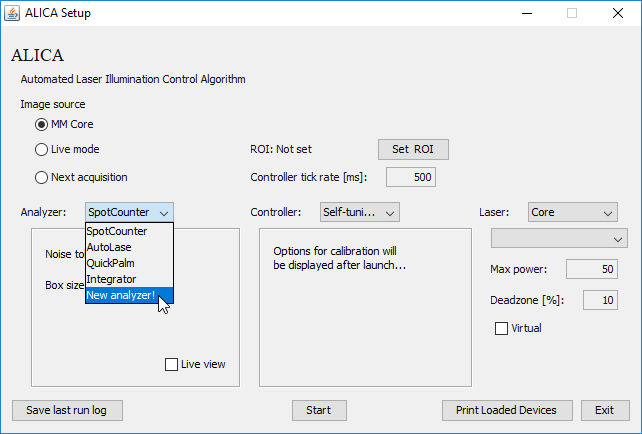
When you launch ALICA, all added Analyzers and Controllers should be accessible via their respective dropdown menus.